For Families
I first started making books in 1987, when my first child was two. I enjoyed celebrating his new life and made books for him and for grandparents, aunts, and uncles. As our world becomes smaller, it is easy to get the feeling that all the important things are happening somewhere else. Making books is way of reminding ourselves that the family is the center and affirming our value as parents and children.
Making Books With Children
Ideas for Book Topics
Ideas for Illustrations
Tools
Materials
Making Books With Children
I like to make occasional big deal books (ones that take special materials and lots of time and planning) and lots of everyday books--simple books that are made quickly.
Everyday books give kids a way to express themselves at home. Books can mark milestones (first day of school, first goal in soccer, first home run, first lost tooth) and document passions (dinosaurs, wizards, music groups, favorite songs). They can be kept as memories or shared with family and friends.
You'll find some simple books to make in the Free Projects section. Older kids can follow the directions themselves but younger ones will need help. I think the easiest way is to demonstrate each step and have them do it after you. Once they know how to make a specific kind of book, they can go ahead and make more on their own. It's good to have extra materials available so they can work independently once they know how.
Celebrate the handmade! Making books is a great time to leave the world of the computer screen behind. If there is reason for needing to use the computer for writing text, that's fine, but if not, encourage your kids to do the writing in their books by hand. They will then be true expressions of the child in every way.
Don't let the kids have all the fun! In addition to making books along with your children, plan some special books that you can make just for them. Whether your creativity (yes, you have it) is something you exercise frequently or lies buried within, it can be expressed through making books for an appreciative audience. Children love the idea of a book made just for them and if they are the star of the story, so much the better.
Ideas for Books
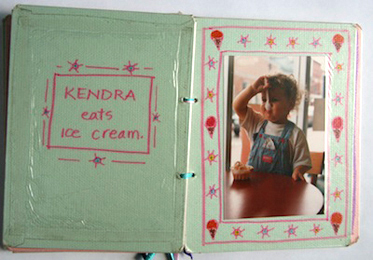
I've made lots of books for my kids over the years. I am inspired by their interests, their activities, and their concerns. We dealt with the coming of a new sibling in Brendan and the New Baby. For her fifth birthday, I documented my daughter's love of gymnastics in Kendra the Gymnast. I often take my inspiration from children's books. I was thinking of Jill Krementz's Very Young Gymnast when I made the book for Kendra. I made a series of books for my son about a disappearing Cupcake Clown that were based on Mercer Mayer's Frog, Where Are You?
Here are some ideas for books for you to make.
Story books: Tell the story of a typical day in the life of your child. Celebrate a special day with a story. Tell stories from your past or that of your parents and grandparents. The writing can be simple and direct. One way to start each page with the same phrase: When I was a boy, I..., When Kendra was a baby, she..., When Grandma was a girl, she... A good model for this is When I was Young in the Mountains by Cynthia Rylant. Write imaginary adventures involving your child. Meet dinosaurs or have favorite dolls come to life.
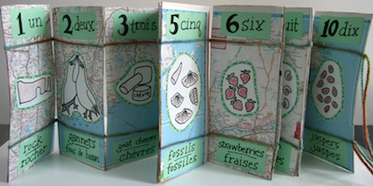
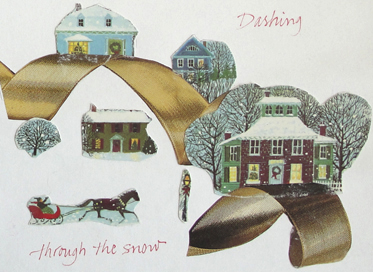
Family Themes: Tell the family's history, including family trees or how the family celebrates a particular holiday with memories and recipes. Record trips taken (book above commemorates our trips to Percé, Quebec), houses and apartments lived in, the events of a particular year. What your family does and where it comes from is special; celebrate it.
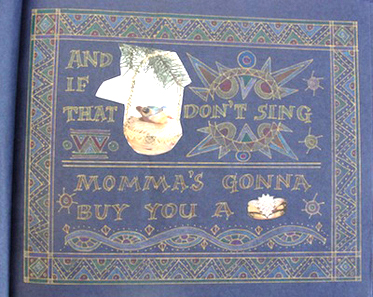
Poetry and Song Books: Make books of favorite Mother Goose rhymes, songs, and poems as well as original compositions. A book can be a collection of favorites or one song or poem with one or two lines per page. My daughter loved a little room in The Children's Museum in Boston where you could hear the song "Hush little baby don't say a word; Momma's gonna buy you a mockingbird" and look at a display. I made her a book of the words to the song with cut out pictures from magazines and catalogs and we sang it together often.
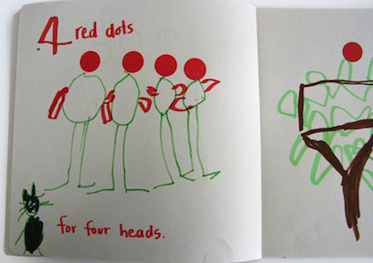
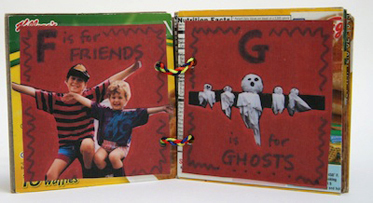
Alphabet and Counting Books: Make your own alphabet and counting books. They can range from simple books for young children to more sophisticated books on particular topics for older ones. My daughter and I made Ten Red Dots which was inspired by Ten Black Dots by Donald Crews. I made an alphabet book from recycled waffle boxes with pictures of my kids cut from photos. C is for candle had a picture of my daughter blowing out a candle. F is for friends has a picture of both kids together.
Party Books: Make books for guests to sign at parties. Make an accordion book with the child's name or Happy Birthday written large across the pages and have the guests sign around it. A blank book with one page for each guest can serve as an autograph book. Save wrapping paper and cards and take some photos to make a memory book after the birthday.
Cards and Gifts: Many of the small books are great for giving, either as an extra special card or small gift.
Ideas for Illustrations
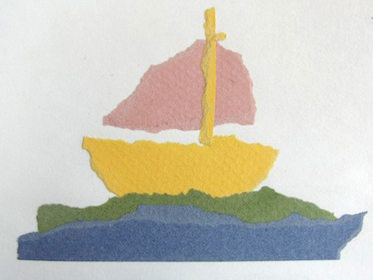
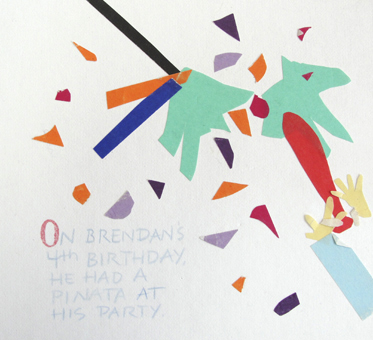
Cut or Torn Paper: This is my favorite technique. Cut or tear paper into shapes. Try not to draw first. Follow the artist Matisse's words: "I draw with my scissors." When gluing, place your item face down on scrap paper and cover the entire back of the piece with glue. Keep a collage box of interesting papers so you'll always have a handy source.
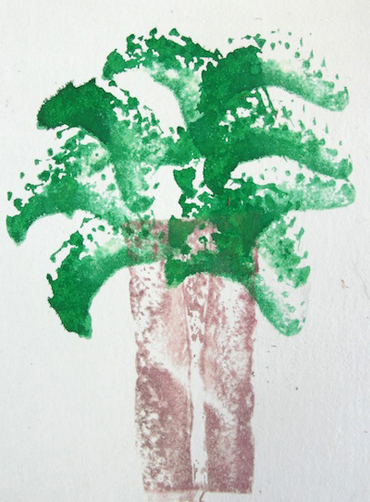
Simple Printmaking: Make potato prints by cutting a potato in half and carving a shape into it. Cut away the rest and the shape will print. Cut other vegetables and fruits and use their natural shapes to create images. The trunk of the tree above is a carrot slice. The leaves are from celery. Try leaves and other found materials. Use poster paint, block printing ink, food coloring, or acrylic paint.
Stamps: Rubber stamps can be expensive but they are easy to use and lots of fun. I like to look for ones that work well in borders and as ornament. You can also carve your own stamps from plastic erasers with an exacto knife. Use stamp pads or color the stamps with marker.
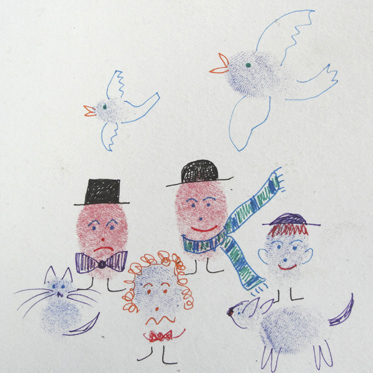
Try thumbprints. Use paint or a stamp pad and print your thumb. Use marker or colored pencil to turn thumbprints into people and animals.
Stencils: Purchase stencils (more information below) or make stencils from poster board or cardboard. Draw your own designs or trace and transfer them to the poster board. It's easiest to do the cutting with an exacto knife. Cover with clear contact paper for longevity.
Photographs: Photographs are wonderful, personal sources of imagery. Use whole photos or cut them up. Attach them with glue or double-sided tape. If the book will be handled by young children, I cover the pages with clear contact paper for protection.
Cut-outs: Magazines are great sources for imagery. For example, for a farm scene, cut a barn from one page and animals from another. Or cut or tear pieces of an image and create your own image from the different colors. Other sources of images are greeting cards and wrapping paper.
Tools
You want the bookmaking supplies organized in a way that's easy for kids to access the materials and put them away after. I'd suggest a shoe box for the tools which would include
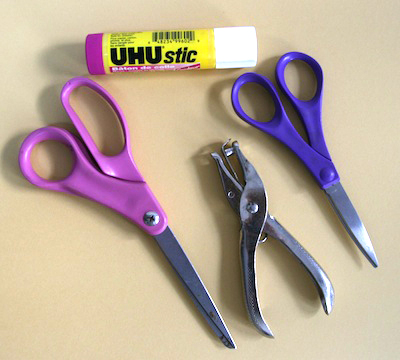
* Scissors: It's important to have decent scissors. I really have a thing against rounded kid scissors especially crummy metal ones that barely cut. You obviously don't want your kids poking their eyes out but it's good to have quality tools especially if you are making books together with your children. Teaching them to be careful of and how to care for tools is important. The Fiskars brand kids scissors work well. I have the pointed ones, which are still not too pointy. I also have a lot of big scissors that I bought when I thought I would be mostly teaching teachers and parents. I've had students as young as kindergarten use them without a problem, and with the additional thrill of using grown-up scissors.
* Hole Punch
* Glue Sticks: For me, glue sticks are the only way to go. They are neater than Elmer's and because there is no moisture in the glue, the paper will dry flat. I prefer colored glue sticks. They go on a color so you can see where the glue is but dry clear. My favorite is UHU brand. Some people feel that they dry too quickly. I like them because you can reposition the pieces if you need to.
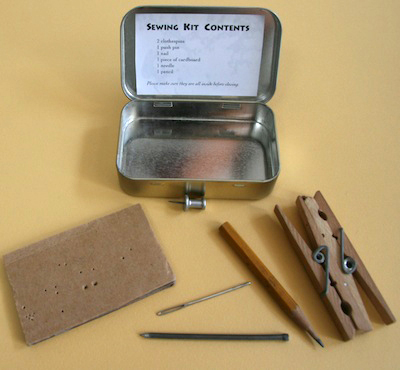
* Sewing Kits: There are lots of small bits and pieces when you sew books together. I think it's easiest to keep the tools together. I used to use a resealable sandwich bag. With my new environmental approach, I now use an Altoid box
* 1 size 16 tapestry needle (These have a very large eye. They're bigger than one would usually use for bookbinding but they're easier to thread. I purchase them at JoAnn Fabrics in packs of 5.)
* 1 small pencil (for marking the holes)
* 1 nail (to make holes for Japanese bindings)
* 1 push pin (to make holes for pamphlet binding)
* 1 small piece of cardboard about 2"x 3" (to protect the table when making holes for a pamphlet binding)
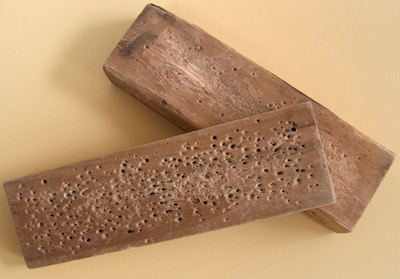
* Blocks of Wood: about 3" x 8" x 1" each. They are used with the nail to make holes for a Japanese binding in a set of two: one goes underneath the book to protect the table, the other is used as a hammer. You can also use a hammer for hitting and place a block of wood underneath to protect the table. I think all wood is better to use for kids working independently--less likely to smash fingers.
* Scrap Paper: for gluing. I use old catalog pages or used 8 1/2" x 11" paper.
Materials
I have been using recycled, or more accurately repurposed, materials in my workshops and at home for the past year. I use brown paper grocery bags, cereal boxes, and used paper that has writing on only one side. I made the change to be more respectful of the environment and reduce consumption but the benefits go way beyond that.
We live in an instant culture filled with manufactured objects. It is not the children's fault that they expect their paper perfect and think nothing of asking for a new piece when theirs has a wrinkle. Using grocery bags, cereal boxes, or paper that they have used makes them aware of the paper they consume.
And there are other positive effects as well. When they start by cutting a paper bag, the paper is already uneven so it takes all the burden of precision away. I find it lightens the spirit of the whole process. In addition to consuming less paper, they learn to look creatively at the things they discard.
Making books with repurposed materials has a different aesthetic. Because we don't start with plain paper, there are often traces of its former life showing. I feel this brings life and vitality to the finished book. I have a collection of objects made from different materials which includes a bag made from juice pouches from Afghanistan, earrings made from soda cans from Africa, a toy car from Africa made from soda cans, and trivet made from rolled newspapers.
Plastic drawers or boxes with lids are great for storing paper. Cardboard boxes will also work. You can decorate them to make them more attractive.
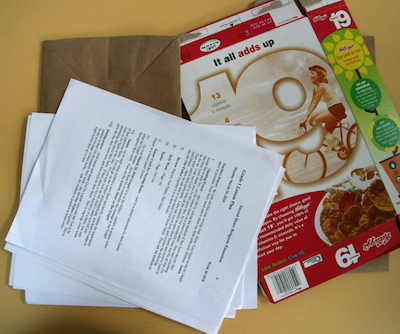
*Paper: Ask for paper at the grocery store and save cereal, cracker, and waffle boxes. The grocery bags are cut down to make paper for the books. The cereal boxes are used for covers and for any project that requires stiff paper or cover stock. They can be flattened for storage.
I also use copy paper with writing on one side only from the recycle bin. In the Hot Dog Booklet, all the writing is on one side of the paper so this works well for them. For accordions, I fold the paper in half the long way with the writing on the inside and use the folded paper to make the pages of the book.
* Yarn: best for books that use knots to hold them together. Ribbon tends to be too slippery to hold. There are a lot of interesting variegated yarns available. I save scraps of yarn and string.
* Ribbon: I use it for ties on accordion books. I buy it at craft stores as well as save ribbon from packages.
*Thread for sewing: Crochet cotton, Dental floss, Carpet thread. In bookbinding, thread is waxed with beeswax before sewing by pulling it through a piece of beeswax. It strengthens the thread and makes it less likely to tangle. I usually don't bother when I'm making books with kids.
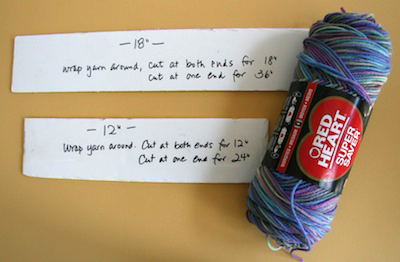
* Cutting Yarn, Ribbon, and Thread: To save time cutting, I have pieces of heavy corrugated cardboard cut to specific lengths. The two sizes I use are 12" and 18". I wrap the yarn or ribbon around the cardboard. For yarn the length of the cardboard, I cut it at both ends; for yarn twice the length of the cardboard, I cut it at one end only.
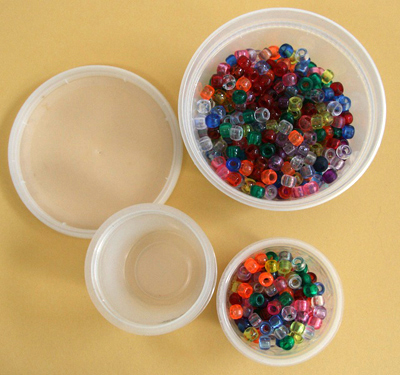
* Pony Beads: for palm leaf books and wish scrolls and to have fun tying them onto any book. I like these because they have holes that are big enough to thread yarn through. I buy them at Michael's, or A.C. Moore, or anywhere I come across them. They are more economical in larger packs. I store them in cream cheese or other plastic containers and pour them into applesauce or other small containers for use.
* Other Beads, Buttons, and Shells: I always look at necklaces and bracelets at yard sales and rummage sales and buy ones with interesting beads. I've also purchased plant holders made from shells. I take them apart when I get home. They can be stored in resealable plastic bags, jars, or plastic containers.
* Plastic bread closures: can be used instead of beads
* Elastics (I save them from vegetables and the newspaper delivery)
* Wish Scroll cases: The wish scrolls from Ethiopia are placed in containers and worn. Originally I used film containers. They are still available but much less common. Other possibilities are prescription containers with the labels removed, the tops of some glue sticks, and any other small tube-like container.
For Illustrations
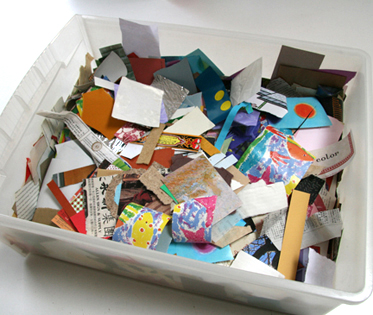
* Collage Papers: Probably my favorite thing in the studio is my collage box. I cut up any interesting colored paper that comes my way- wrapping paper from a package, paper bags, security envelopes, origami paper, art papers, etc.--into ssmall pieces and keep them in the box. I find that the smaller size wastes less paper and seems to stimulate creativity in a way that large pieces of paper don't.
* Rubber Stamps: Rubber stamps are fun sources of imagery. They can be used for pictures or for pattern in borders. They provide an alternative for those lacking in artistic confidence. They are expensive, but I think worth the investment. However, kids can make a mess of them quickly as the ink from the stamp pads gets on their fingers and then onto everything else. I cover the top of my stamps with clear contact paper before I let anyone use them. I sort my stamps by theme- Flowers and Leaves, Animals, In the Sky, Dinosaurs, Patterns, etc.- and keep them on plastic plates. On each plate, I put a label with the Theme and cover it with clear contact paper. I store the plates in resealable plastic bags. It's helpful to wipe the stamps on a piece of scrap paper after each use, but I don't do any additional cleaning.
*Stamp Pads: I use micropore stamp pads from office supply places. The pigment stamp pads that are sold at stamp stores have better colors, but they are kind of gooey and can really make a mess. They require more vigilant cleaning.
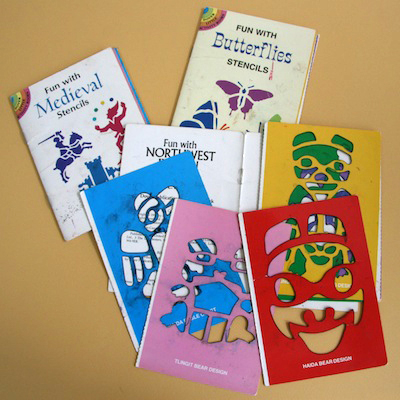
* Stencils: Dover Little Activity Books has a series of inexpensive Fun with Stencils books with 6 pre-cut stencils in each. There are ones on Dinosaurs, Flowers, Northwest Indian, Pirates, Egypt, and many more. I've seen them in bookstores, card shops, and toy stores. I order mine directly from Dover Publications, Inc., for the largest selection. I also buy letter stencils and other plastic stencils. I have made stencils by tracing cookie cutters onto poster board, cutting the image with an exacto knife, and protecting them with clear contact paper. I also made a series of sea life stencils by tracing pictures from books and transferring them to poster board.
* Markers: I like markers for writing and for the vibrancy of color in drawing. However, they can bleed through so I test the marker first on an extra piece of paper if I am going to be writing on both sides of the paper. For the writing, it may be helpful to write the text lightly in pencil, proofread it, and then go over it in marker. Whiteout should be used cautiously; it can make a mess. Test it first with the marker on scrap paper.
* Colored pencils: Colored pencils are a good choice. While they won't bleed through, some care should be taken to not press too hard when writing on both sides of the paper. Drawings can be made in colored pencil or with a dark marker and colored in. I also like to color in rubber stamp images with colored pencils.
For video tutorials, visit my youtube channel.
To purchase instructional books and ebooks, visit my etsy shop.
Back to Top
© 1999-2021 Susan Kapuscinski Gaylord
skgaylord (at) makingbooks.com
www.makingbooks.com
|